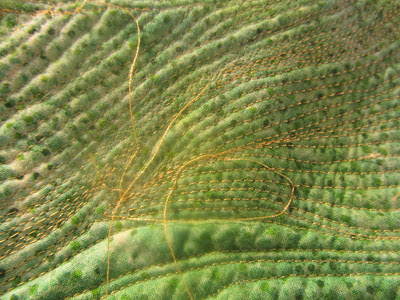
For many years an elderly friend of mine spoke often of the beauty and serenity of Three Rivers, California. When life became stressful and she felt a need to meditate and realign with her beloved Higher Power, she would make a solitary journey to what was most likely her heaven on earth and revel in it's glory for a day or two.
Long after my dear friend had gone to meet her Heavenly Father, I never forgot her mentions of Three Rivers. I looked on the map and found it to be at the southern end of Sequoia National Park in Central California. This would be no surprise to those of you who follow my blog from Visalia. You have had this beautiful gem in your backyard since almost the beginning of time.
By 2003, I was ready to go exploring. I was stressed, wanting to watercolor, and the owner of a new car.
Three Rivers definitely did not disappoint. It was truly an artist’s haven. The only problem, though, was that I heard something big snorting around the base of my rented cabin the first night. Being a seasoned camper who has spent many a vacations in a tent, I still felt fairly secure in my warm bed.
The next morning I asked the groundskeeper if there were bears about. She nodded and smiled. A co-worker of hers at a nearby motel recently had an unexpected meet-up with a bear when he went to dispose of the trash. Fortunately, the bear was just as surprised as he: It ran one way, and the worker, the other.
That got me to thinking that I might need to give up my plans to sit on a rock and watercolor to my heart’s content for hours on end. Then when I spotted bear droppings just a few hundred feet from my cabin, I was convinced.
Fortunately, I had brought my camera along. I decided to jump in my car, meander along the local curving mountain roads, and grab some snapshots that I could later translate into watercolors in the safety of my own home.
![IMG_1617[1] IMG_1617[1]](https://blogger.googleusercontent.com/img/b/R29vZ2xl/AVvXsEiXolj1hNI3Du5e-qzjgl3Mwk-N_zeJKEL5hVdLr1CKP0TosZnpNOhZQKNlYG5G6xIBtouP7aq4mT7Vro7PY_VGGqJ51qJuMVkxDE7dQGNKzfxlVzuGpacR_h9ATqZE_5yjJ7ZDZ-2jY5w/?imgmax=800)
Although that November day was drizzling and cold, the autumn leaves stood out like shards of fire. I turned onto a steep winding road that promised to end at Mineral King. The scenery was gorgeous, so I stopped every mile or so and took many pictures with my trusty 35mm Minolta. When I reached Kaweah Bridge, my senses were literally blown away by its impossible architecture and the severity of the rocky canyon that it miraculously spanned.
![IMG_1630[1] IMG_1630[1]](https://blogger.googleusercontent.com/img/b/R29vZ2xl/AVvXsEhsZMvN7oTKIKY73YNwqM-BVjXIIvwqWs3JcuqMMWUR0UQ4Jui-yYOe4LYCBXUdYbArDAt777Z7NeDZAKThd7sFxuZfIjmA1ITV0DmP9CqUGvKMXgl4dROImh2ci0RLBsAV3w1YH-5kRi4/?imgmax=800)
I never did make it to Mineral King Valley. According to Wikipedia, it is a 25 mile winding drive that takes about 90 minutes to traverse. After an hour or so and only seven miles into the trip, I decided to turn around and head back to Three Rivers. I had what I thought to be a treasure trove of snapshots, and I wasn’t really believing that Mineral King Road was ever going to arrive at its destination.
The photos definitely turned out to be ones that I could use as both a reference and inspiration to do art work. The interesting thing, however, was at that point in my life I had already started on another journey from water coloring to quilting. I was only at the beginning stages of learning to piece blocks but knew that someday I would possibly be able to translate some of the photographic images into art quilts. With no particular timeline in mind, I just began quietly collecting supplies—vibrant batiks, fabric paints, and spools of thread. Occasionally I would glance at my Mineral King stash and ponder how it would all ultimately come together. Yet something just seemed to be missing in regards to recreating the scene of the autumn tree by the side of the road.
![IMG_1624[1] IMG_1624[1]](https://blogger.googleusercontent.com/img/b/R29vZ2xl/AVvXsEiyjjucayUJzrFv-5ML0kFS8UnA62I5fg38q4ov09m1l3CISMaI5HcPRuXIDGdxhGGR8nylu8EC6tVt0VjDdzuXc2D4GbrxsU55OXT_E1jTm0pjXmkvONROt059kyjI82gbHTjF8TWMaQ0/?imgmax=800)
Then I found this. The last lonely piece at the end of a bolt.
![IMG_1615[1] IMG_1615[1]](https://blogger.googleusercontent.com/img/b/R29vZ2xl/AVvXsEj-NHPO75p_F8HiI6-YXRjbEoEwfGJgv4FIEOJXKoce34W3mmLqZIQBOyPQpA4O1HXJ91Ie3WyhedRn0KcmYT13Y7sAWW0hcsLOIRXVCBNMkc6UicdDRYpp5o4it0A3PSPcDIzpyQMB1qg/?imgmax=800)
I am normally not a fan of Indian batiks, but this one was of a higher quality fabric, and certainly, quite artful. As I pressed it today and thought about its future, it brought back all of the lovely memories of my friend who had urged me toward Three Rivers in the first place.
I am still not exactly sure where I am going with this composition nor when it will be finished. I will just entrust my muses to carry my imagination where it needs to go.
After all, it’s a long road to Mineral King.
![IMG_1691[1] IMG_1691[1]](https://blogger.googleusercontent.com/img/b/R29vZ2xl/AVvXsEiKBBNFFu5iQGmF-1uZuZoGRWNL4MC1uK_djvCYIOKhyphenhypheniHyMqB5HdQ7QtPiOROfiyuB2z6oZuOjNp1qjZ1480QGXa6pL0xTrSjYLG8Jjiz2LVk5-xZxvoIlS06ZNOjLy2AtW9Hxe1554mQ/?imgmax=800)
![IMG_1688[1] IMG_1688[1]](https://blogger.googleusercontent.com/img/b/R29vZ2xl/AVvXsEiJnsKvc39_o7XALgn_8kIJ3xmqo2vpOidqHe17dpQW6paKFw4-a2Zzj7O7nm4qq8WDGGQgoKkNH9WAL_ePrz47OjgKMA5ywfxKlFgB22kVxN8i4LHjp42Sfsguc2JHpmy6yozGd5OxP2k/?imgmax=800)
![IMG_1686[1] IMG_1686[1]](https://blogger.googleusercontent.com/img/b/R29vZ2xl/AVvXsEiiwM9FkwmQPEwlNZFNYAsbGMeQ2yckH_y_NkpYDfZ-CVs-aBcGhVjRS6XrOmXJMmVwWk8fQON9NyenHo3FD3CprVVXtjjMTa6WBPHqAtL3Ii2eR7gbqOyb_iUy9g-QZY0HMqmFxP47MGs/?imgmax=800)
![IMG_1682[1] IMG_1682[1]](https://blogger.googleusercontent.com/img/b/R29vZ2xl/AVvXsEjbKHK9RatXHyO08rWuNH5ePSdkkRWmvsddYjudF_zxDL9Ydu9UAoFpxwj-ETuHeplrhMr7k5S73_wn7OsFuPFsAskpyfqi8YiKNrYK1AIgNZjq14CizoltnzcRKlEiE765mr6ckf4mfhg/?imgmax=800)
![IMG_1684[1] IMG_1684[1]](https://blogger.googleusercontent.com/img/b/R29vZ2xl/AVvXsEgp3DBn5Q3hY5qHNJaTbBRjVrj-HUbwrPEYR2vFJOnoUarezdlBYcBIwniCUjUQwqoEwFvyEXkYppsYE78PJq4Nx6VgUnWIBdcDlgXkhL7lFLZcdVb9LLE7fHMib_Qlg9WXjrwoa5D-7V4/?imgmax=800)


![IMG_1657[1] IMG_1657[1]](https://blogger.googleusercontent.com/img/b/R29vZ2xl/AVvXsEhPhaNDkNdBCtaXUcZ0X8T_mDpGpJep460OTVXBRYa7_xQX04R072Z2m_-ahBf5rq6RVHX0LJUhTcNvAlMfI3VEcHMhTlpD3yKaz0Zg5heMH7xfwAs0Ni50PS5LmGybMHqek0j9UIU5pI4/?imgmax=800)
![IMG_1659[1] IMG_1659[1]](https://blogger.googleusercontent.com/img/b/R29vZ2xl/AVvXsEiQ_eIwz37hSXQyVFAc_48OJ7gK-L79HCXzloY4UtZKA1OU2NY1pff1jwPilzThbBdPpE1uevizrlqD9Sgv0uQnGFy9qsb3jIC_v5-QDRW7IBVuDSN-3UlHkJVN7B-F5nLex-5A9yVZ14o/?imgmax=800)
![IMG_0995[1] IMG_0995[1]](https://blogger.googleusercontent.com/img/b/R29vZ2xl/AVvXsEhFyq3NaNILKGbomV-VMV3Q4W1Td2eoTKBpA4ScG9uQGc0uFx8Fa3Jd4V00TLCAjBMeid04GAnOr1EGURIq46ge5XGm6E9IvN7CvM1A7x35OvEEJX-6usWroKsz3xHRjtDJi3PNGmiwoMs/?imgmax=800)
![IMG_1641[1] IMG_1641[1]](https://blogger.googleusercontent.com/img/b/R29vZ2xl/AVvXsEg_cK6FbU9ucw4yzVaYufvYJO2o_qVbyuUOEXY3fViOJNlv7v7VtsR9Bs97uzsnHIYEKhBkJbJnboXCVSEx5pqg8yisE9PFp4rU9nhOIsnXmErI0nLgA9v9kkSD8NEehwNRfVoulHvL8Zw/?imgmax=800)
![IMG_1642[1] IMG_1642[1]](https://blogger.googleusercontent.com/img/b/R29vZ2xl/AVvXsEgt2u4ebh9E00Wfr7vt1Xt_yOjYozi46-Dw0L3tGFWrD10fxtgY1zIfKyYOJ0hcMDbSLSzqlUSJPW-l-VAHju6rbGC5Sgzqoru3RsZei-EWiSZNgtWp_ja-8wno4p35w-KWtmOI-Ah3kkc/?imgmax=800)
![IMG_1632[1] IMG_1632[1]](https://blogger.googleusercontent.com/img/b/R29vZ2xl/AVvXsEiRwoEH4XZ-lFpdnFwD8GaCZD9f26vFuuuUTGkNAohAqVyKbJ7XhDph8mbZgB3vca6PsKZuAsg90zw8JY64rk5PGG7QIBSMKPd2EAlgIDnMlSx9h92lMbOVsjFFcheC2yzcIkt660TCaFM/?imgmax=800)
![IMG_1634[1] IMG_1634[1]](https://blogger.googleusercontent.com/img/b/R29vZ2xl/AVvXsEhKNfCFFlHsCzegiSHYQcar_YUR5aLtyweGVle0J1SODI-_1-Rko3Qvc1Xa7WdbluAFvtDSLyLVWCbMvYy5-uxXT_KEd3o_QhGBgLsnLBQtom-uK-gBiJro0mRu7yt8MJkjS7DoOTFD-40/?imgmax=800)

![IMG_1617[1] IMG_1617[1]](https://blogger.googleusercontent.com/img/b/R29vZ2xl/AVvXsEiXolj1hNI3Du5e-qzjgl3Mwk-N_zeJKEL5hVdLr1CKP0TosZnpNOhZQKNlYG5G6xIBtouP7aq4mT7Vro7PY_VGGqJ51qJuMVkxDE7dQGNKzfxlVzuGpacR_h9ATqZE_5yjJ7ZDZ-2jY5w/?imgmax=800)
![IMG_1630[1] IMG_1630[1]](https://blogger.googleusercontent.com/img/b/R29vZ2xl/AVvXsEhsZMvN7oTKIKY73YNwqM-BVjXIIvwqWs3JcuqMMWUR0UQ4Jui-yYOe4LYCBXUdYbArDAt777Z7NeDZAKThd7sFxuZfIjmA1ITV0DmP9CqUGvKMXgl4dROImh2ci0RLBsAV3w1YH-5kRi4/?imgmax=800)
![IMG_1624[1] IMG_1624[1]](https://blogger.googleusercontent.com/img/b/R29vZ2xl/AVvXsEiyjjucayUJzrFv-5ML0kFS8UnA62I5fg38q4ov09m1l3CISMaI5HcPRuXIDGdxhGGR8nylu8EC6tVt0VjDdzuXc2D4GbrxsU55OXT_E1jTm0pjXmkvONROt059kyjI82gbHTjF8TWMaQ0/?imgmax=800)
![IMG_1615[1] IMG_1615[1]](https://blogger.googleusercontent.com/img/b/R29vZ2xl/AVvXsEj-NHPO75p_F8HiI6-YXRjbEoEwfGJgv4FIEOJXKoce34W3mmLqZIQBOyPQpA4O1HXJ91Ie3WyhedRn0KcmYT13Y7sAWW0hcsLOIRXVCBNMkc6UicdDRYpp5o4it0A3PSPcDIzpyQMB1qg/?imgmax=800)
![IMG_1579[1] IMG_1579[1]](https://blogger.googleusercontent.com/img/b/R29vZ2xl/AVvXsEgQ_4bVmRKbUjOJ2OuZI7w3WZbZxnpuiSnm9mDPr2iUOEfRbc9JH3SSF7HHvxJTjr2XLqAp2Xfs1l6-J2iqnPJG1dIjouIJMtN7jSRN2yJU15YwUY5ErG3IX2ze39HKBHW75x7vNNfjNEo/?imgmax=800)
![IMG_1585[1] IMG_1585[1]](https://blogger.googleusercontent.com/img/b/R29vZ2xl/AVvXsEhzBZ8YrlypytWir9dpjVGQ162Xnh6FhUkAYLXQgDPq0_T9zD9nVuMTgEnMcTNoscLpNG5tdwCk2HieHf6idJzp6fCFt3WmI_x7oXHnovGoAkU_Hc89bG7YZF5c0Zhd8ZdK4GCb-AMz-NU/?imgmax=800)
![IMG_1578[1] IMG_1578[1]](https://blogger.googleusercontent.com/img/b/R29vZ2xl/AVvXsEhQ9rYN9BLOb-w48R1133PotlHwHBRF9dnufhEC0YfgSAxM4xO-l76IUoezHThmqYddkajfQswYrMleJhv5ccvM3_Ted9qSVOZNhGIsz6cA7WW4khOrsFsES5HPKUgE3hH7Y3LhrwPuETE/?imgmax=800)


