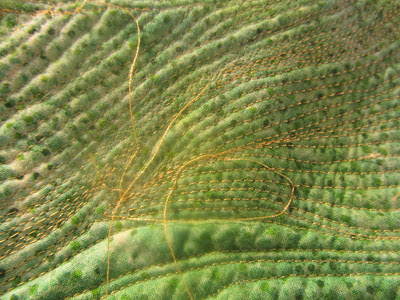
Several years ago, I attended a quilt show, which was sponsored by a medium-sized guild here in California. I will never forget a stately, glimmering quilt that had obviously been finished at the last minute. Although the choice of fabrics and the piecing was exquisite, the maker had left some very long loops of thread on the face of her quilt, right at eye level to most viewers. Since the competition wasn't particularly stiff, the judge had rightly awarded the quilt a ribbon. What I didn't understand, however, was why the quiltmaker's guild pals hadn't called her on the phone, congratulated her, and asked her to run down to the show with a tiny pair of scissors and touch her quilt up.
Okay, I'm compulsive. But I also know what can make or break a quilt at a competition. So I just thought I would pass along a few tips to give you a little advantage.
This is the back of my current soon to be finished work in progress. Notice the rat's nest of threads that has built up. Sometimes, I have to stop several times through the quilting process and clean things up just to be able to move on. This quilt wasn't too bad in that respect since there were lots and lots of places where I could quilt without stopping and cutting or changing the thread.
Sorry the pictures are a little blurred in some places. The quilting makes this project very dimensional and difficult to photograph.
The first tip is to try not to end a line of stitching out in the middle of nowhere. Try to wedge it in a seam, a ditch, or go full circle and retrace the first several stitches you made. I slow way down at that point and even try to get my stitches to match exactly, setting the needles down manually in the previous holes made by the needle. Besides looking more finished, this will provide a little insurance that your stitching does not unravel easily. This is particularly true if you are sewing with synthetic threads. They have an annoying habit of wanting to pop up.
The next thing I am going to tell you to do is something that is not one of my favorite quilting activities, but the results are certainly worth it. I thread all those loose ends through a large-eyed needle and run the thread into the batting for several inches. If there is any thread left dangling from the needle when I bring it back up, I carefully snip it off right where it exited the quilt. Depending on the quilt, it can be easier going from the front or the back. On this particular quilt of mine, there is a lot of fusible applique on the front, and therefore, it is easier to gently pull the thread tails to the back and then tuck from there. I am still going to have to catch a few stray ones on the front.
The most "painless" way to do this is put a movie on the TV, prop your feet up, and tuck threads. It really helps.
This is the cleaned up version with all the threads nicely tucked and tamed. If you have any threads still threatening to escape, you can always put the tiniest dot of Fray Check on it to keep it from unraveling. Do this with a toothpick rather than with the applicator tip. Tips have been known to come off or drizzle too much liquid, and ultimately, spoil a project.
Happy tucking!


I can't wait to see the whole quilt! Thanks for the tips.
ReplyDeleteOn my seascape which is the first fusible applique I have done, how to I minimize the tiny fuzzy edges? I have used basting glue very sparingly and it looks good and clean-before I do the whole thing, are there drawbacks to that? I can't wait to see this one either.
ReplyDeleteThanks for the good question, Elaine. I satin stitch around most of my fusible applique pieces and try to contain the fuzzy edges that way. There are a couple posts on my blog about satin stitching techniques. I also have another little trick, which I will share in a later post. Sometimes I don't realize that there are things I have been doing for years that I can share with other quilters. I just quietly figure things out, then keep on quilting.
DeleteI hope it wasn't one of my quilts. Sometimes you just don't see the threads. Please tell me if you see them on mine and I will definitely come bearing scissors to clip those pesky buggers. As always, your explanation of techniques is done well. Thank you.
ReplyDeleteNo, Barb, it was certainly not one of your quilts nor by anyone in the Central Valley. We have our standards, don't you know.
DeleteGreat ideas,,, thank you for sharing!
ReplyDeleteWhen I get to the point of machine quilting my quilts, I will definitely use this method!
ReplyDeleteThanks for the how-to. Have a great weekend!